Chiles en Escabeche de la TÃa Cristina
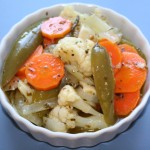
 Chiles en Escabeche are a Mexican staple, this recipe was assembled from some scribbles and notes while helping my aunt Cristina make a big pot of them to can for gifting. It was a fun day in the kitchen… we made TONS and I had the “honor” of processing the onions, garlic cloves and chiles, hehehe, that’s what happens when you’re the “pinche”. These chiles are in many restaurants at the table and most people keep them at home. You can add them to any savory dish, tortas, tacos, or just munch on the escabeche veggies as a snack. This particular recipe has serrano chiles, and a lot of them, for a less “picante” version try seeding and deveining the chiles, or use Jalapeños. You can also use less chiles and more veggies, a common practice because a lot of people LOVE the veggies, especially the carrots. In some recipes they use more olive oil, or the spices and herbs are adjusted to taste depending on what you like. Also, some recipes call for baby potatoes, quartered and blanched, that taste very very good but the starches tend to cloud the escabeche liquid. Think of this recipe more as a set of guidelines and have fun… think green beans, bell peppers, zucchini, etc… So yummy!
Ingredients:
- 15-20 Chiles Serranos sliced in half lengthwise
- 2 Onions sliced into thin half-rounds
- 2 heads of garlic, separated and peeled (I use 3 heads some times)
- 3 large carrots, peeled and sliced in rounds
- 1 small cauliflower head, separated into florets
- 2 tsp of mexican oregano (dry), or use a mix of fresh and dry
- 1 tsp of thyme
- 1/2 tsp of marjoram
- 4 bay leaves
- 5 pepper corns
- 3 whole allspice corns
- 2 whole cloves
- 1 tbsp of salt (or to taste)
- 1/4 of a cup of olive oil
- 3 cups of vinegar
- 1 cup of water
Process:
- Blanch the carrots and cauliflower in plenty of water. Drain and set aside.
- In an enameled or stainless steel pot heat the olive oil, sauté the onions and garlic for a few minutes, then add all the herbs and spices, sauté for another minute or so.
- Add the chiles, carrots and cauliflower florets into the onion/garlic mix, and salt and sauté for a few minutes.
- Pour the vinegar and water into the pot and let it boil for 2-3 minutes, until the vinegar releases some of its alcohol.
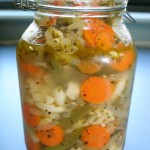
- Put the escabeche in clean jars, wait until it has completely cooled off and refrigerate (use within a month), or can into sterilized jars and keep in the pantry for up to 6 months.
- The escabeche is much better after a week or so.
Notes:
 For a less acidic recipe, use a bit more water and less vinegar, but I like mine with a “bite”.
Make sure you do the whole thing in a non-reactive pan because otherwise the vinegar with corrode it.
In my hometown (Ixtapan de la Sal, Mexico), they do whole jars of garlic cloves, or they use Manzano chiles, which are a bigger and slightly less picante version of habaneros (please note the ‘slightly’ part). Lots of good memories of home…
